Adding Let's Encrypt to your Azure Web App
2017-03-23

Securing your Azure Web App with a SSL certificate
This is no longer an option. Sites need to be served over SSL and I don't think that there are a lot of solid arguments contrary to this approach. There are numerous methods to obtaining an SSL certificate but the service I'm going to be using for this post is called Let's Encrypt. They have a nice explanation of their service here but the short of it is that it is a free service with shorter than normal lifetimes on their certificates. One of the principles with their service is normally certification installation is a manual process, especially so for a hobbyist or a small company with little to no professional IT support. If you have a certificate that expires more frequently then an API would be a nice way to enable some automation on this security process. Let's Encrypt serivces use the ACME protocol and there are many client implementations for it.
Allowing Automated Access to your Azure Subscription
One of the prerequisites of using an automated approach for the Let's Encrypt automation for Azure Web Appss is going to be setting up a (Azure Service Principal)[https://docs.microsoft.com/en-us/azure/azure-resource-manager/resource-group-create-service-principal-portal]. This type of access is required in Azure since the automation is going to be modifying your Azure Resources. There is a script available from Microsoft that will make this process almost trivial. If you visit their GitHub profile you can download and run the script
Here is what that script execution will look like
C:\> .\SPNCreation.ps1 -password "your-password" -subscriptionName "Pay-As-You-Go"
Provide your credentials to access Azure subscription Pay-As-You-Go


Environment           : AzureCloud
Account               : [email protected]
TenantId              : some_guid
SubscriptionId        : some_guid
SubscriptionName      : Pay-As-You-Go
CurrentStorageAccount :

Creating a new Application in AAD (App URI - http://VSO.you.some_guid)
VERBOSE: Performing the operation "Adding a new application with display name 'VSO.you.some_guid'" on target "VSO.you.some_guid".
Azure AAD Application creation completed successfully (Application Id: some_guid)
Creating a new SPN
SPN creation completed successfully (SPN Name: )
Waiting for SPN creation to reflect in Directory before Role assignment
Assigning role (owner) to SPN App (some_guid)

RoleAssignmentId   : /subscriptions/your_subscription_id/providers/Microsoft.Authorization/roleAssignments/your_role_assignment_id
Scope              : /subscriptions/your_subscription_id
DisplayName        : VSO.you.some_guid
SignInName         :
RoleDefinitionName : Owner
RoleDefinitionId   : your_role_definition_id
ObjectId           : your_role_object_id
ObjectType         : ServicePrincipal

SPN role assignment completed successfully

Copy and Paste below values for Service Connection
***************************************************************************
Connection Name: Pay-As-You-Go(SPN)
Subscription Id: your_subscription_id
Subscription Name: Pay-As-You-Go
Service Principal Id: your_new_client_id
Service Principal key: <Password that you typed in>
Tenant Id: your_tentant_id
***************************************************************************
Leave your terminal open or at least save that last section as we'll be using it later. Now onto getting your site created.
Create your Azure Web App
In order to leverage SSL for your web app you are going to need a minimum service level for your Application Service Plan that supports SSL. Currently you need at least a B1 Basic plan in order to support SSL certificates.
Once you have your service plan setup go ahead and add an web app to run on that service plan. I enable mine for 64-bit but where we are headed you can also use 32-bit as well.
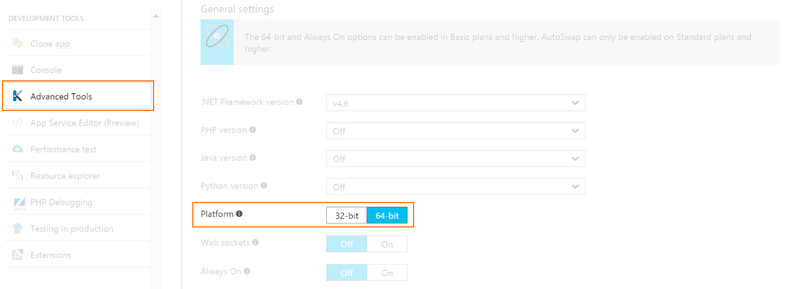
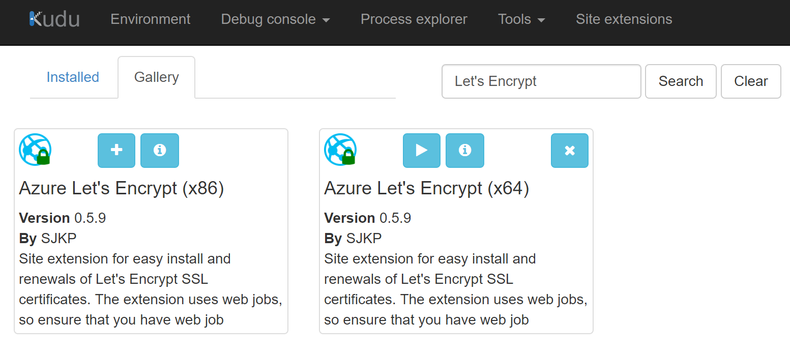
To get the automation setup for the Let's Encrypt certificate start the Kudu Advanced Tools and do an extension search for 'Let's Encrypt'. Select the appropriate bitness that matches your previous selection and install it.
Taking those settings you saved from setting up your Azure Service Principal and enter those into the extensions settings panel.
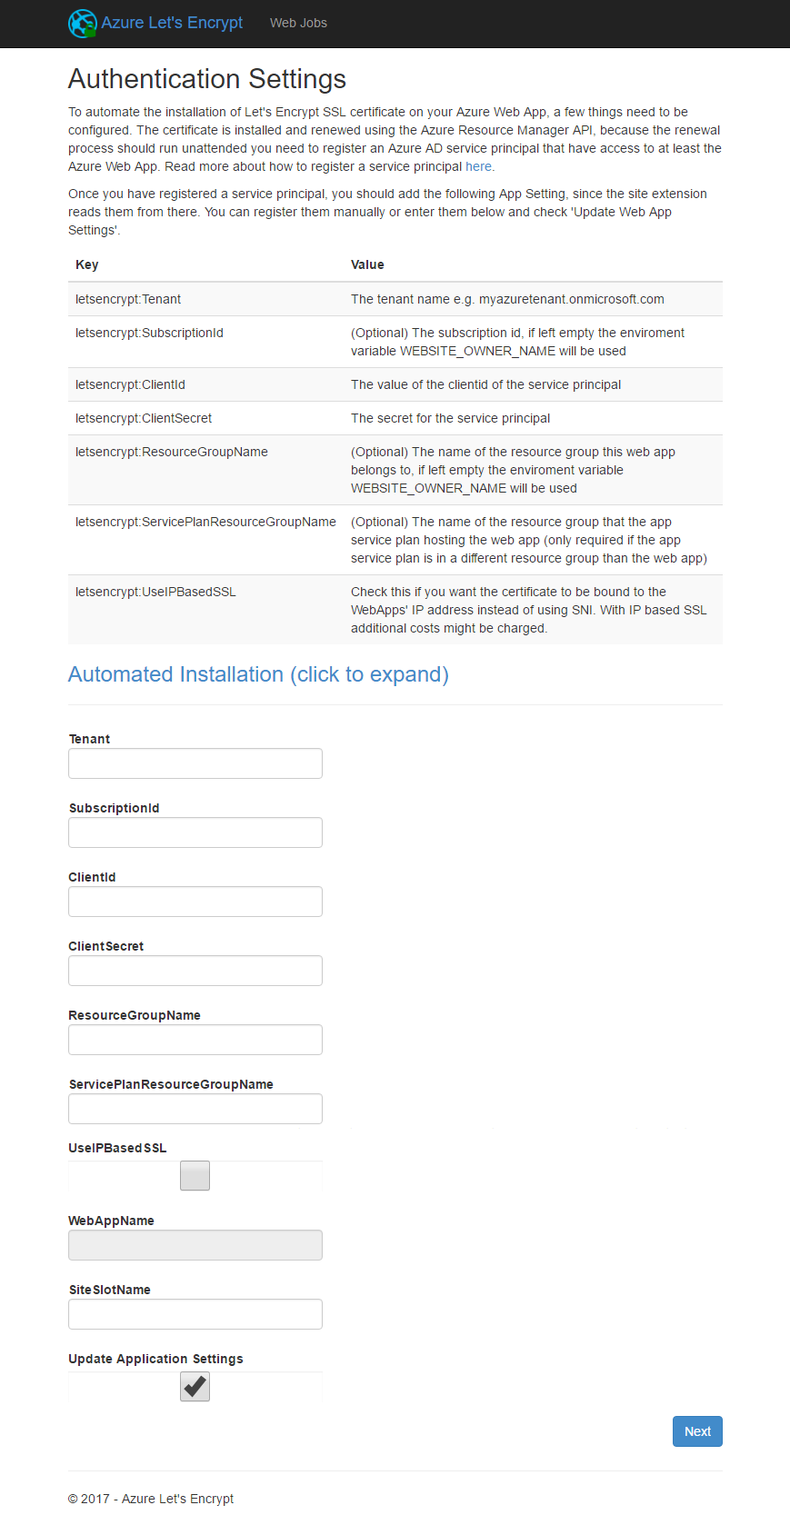
If you got all the settings entered in correctly you'll get a site selection screen where you can select the sites you want to automation takes to get certificates for. In my case I selected both www and the bare site.
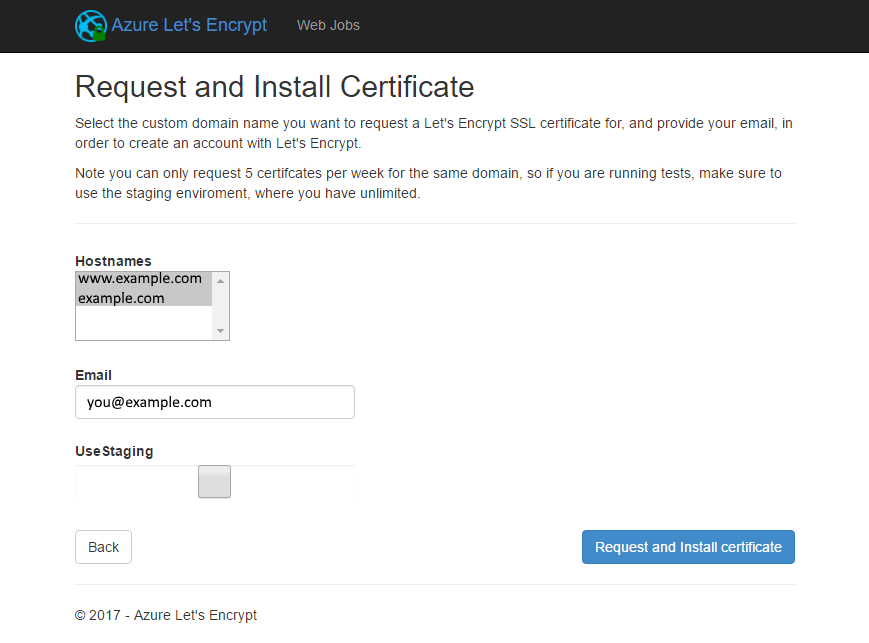
Now you're ready to request your cert and have it installed in your web application. This can take a second or two but after you see the confirmation message your web app will be SSL enabled!
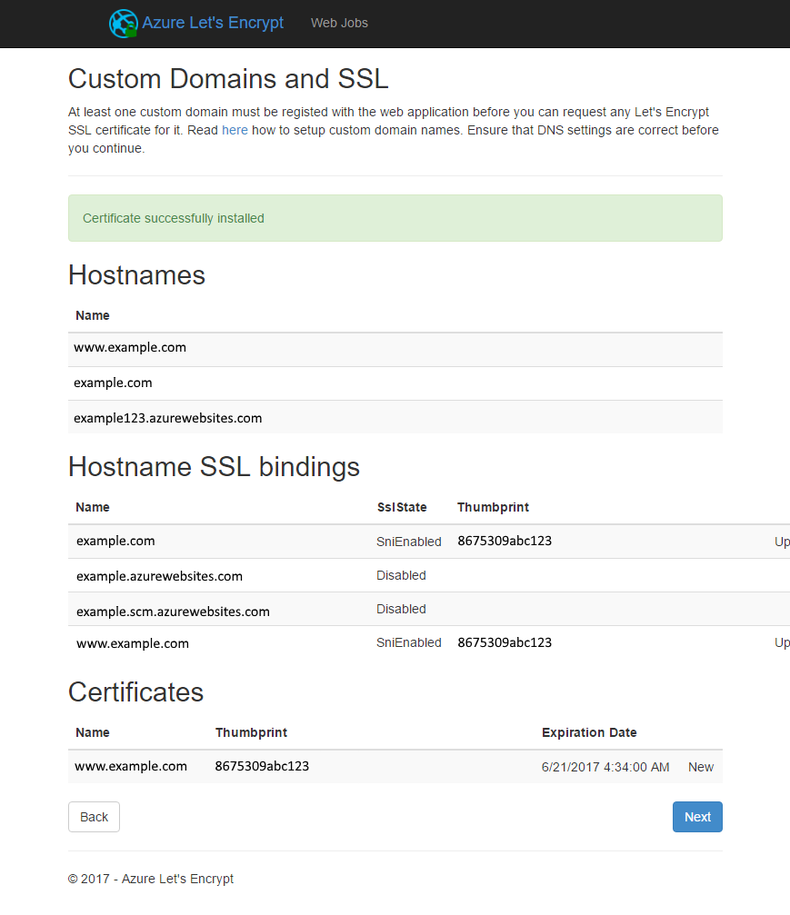
The tricky part is realizing that is all it takes. Your site is available over a SSL connection and your users have the added benefit of that security layer. Since that extension is configured as a Azure Web Job it will keep track of the expiration and automatally fetch a new certification before it expires.